Have you ever wondered how photocopiers work?
You may think that the process of photocopying a document is really simple. You take a document, put it on the glass screen of a photocopier, a green light passes along the glass. After a few seconds, an identical copy of the document you placed on the screen comes out of the side of the machine.
But have you ever wondered what goes on underneath the glass? Photocopiers are quite complex pieces of machinery; here is our very simple guide to how a photocopier works.
A photocopier relies on the principles of electricity and photoconductivity to work. There's a light-sensitive photoreceptor inside the machine that first attracts and then transfers toner particles onto plain paper to form a copy of a document.
So how does a photocopier work?
After you've put your piece of paper (the master copy) on the glass screen of the copier and pressed the big green button, the machine takes several steps before your copy comes out.
Photocopiers work on the principle that 'opposites attract'. Toner is a powder that is used to create the printed text and images on paper. The powder is negatively charged, and so it is attracted to something positive - the paper.
The drum, which is located in the heart of a photocopier, is positively charged using static electricity.
An image of the master copy is transferred onto the drum using a laser. The light parts of the image (the white areas on a piece of paper) lose their charge so become more negative, and the black areas of the image (where the text is) remain positively charged.
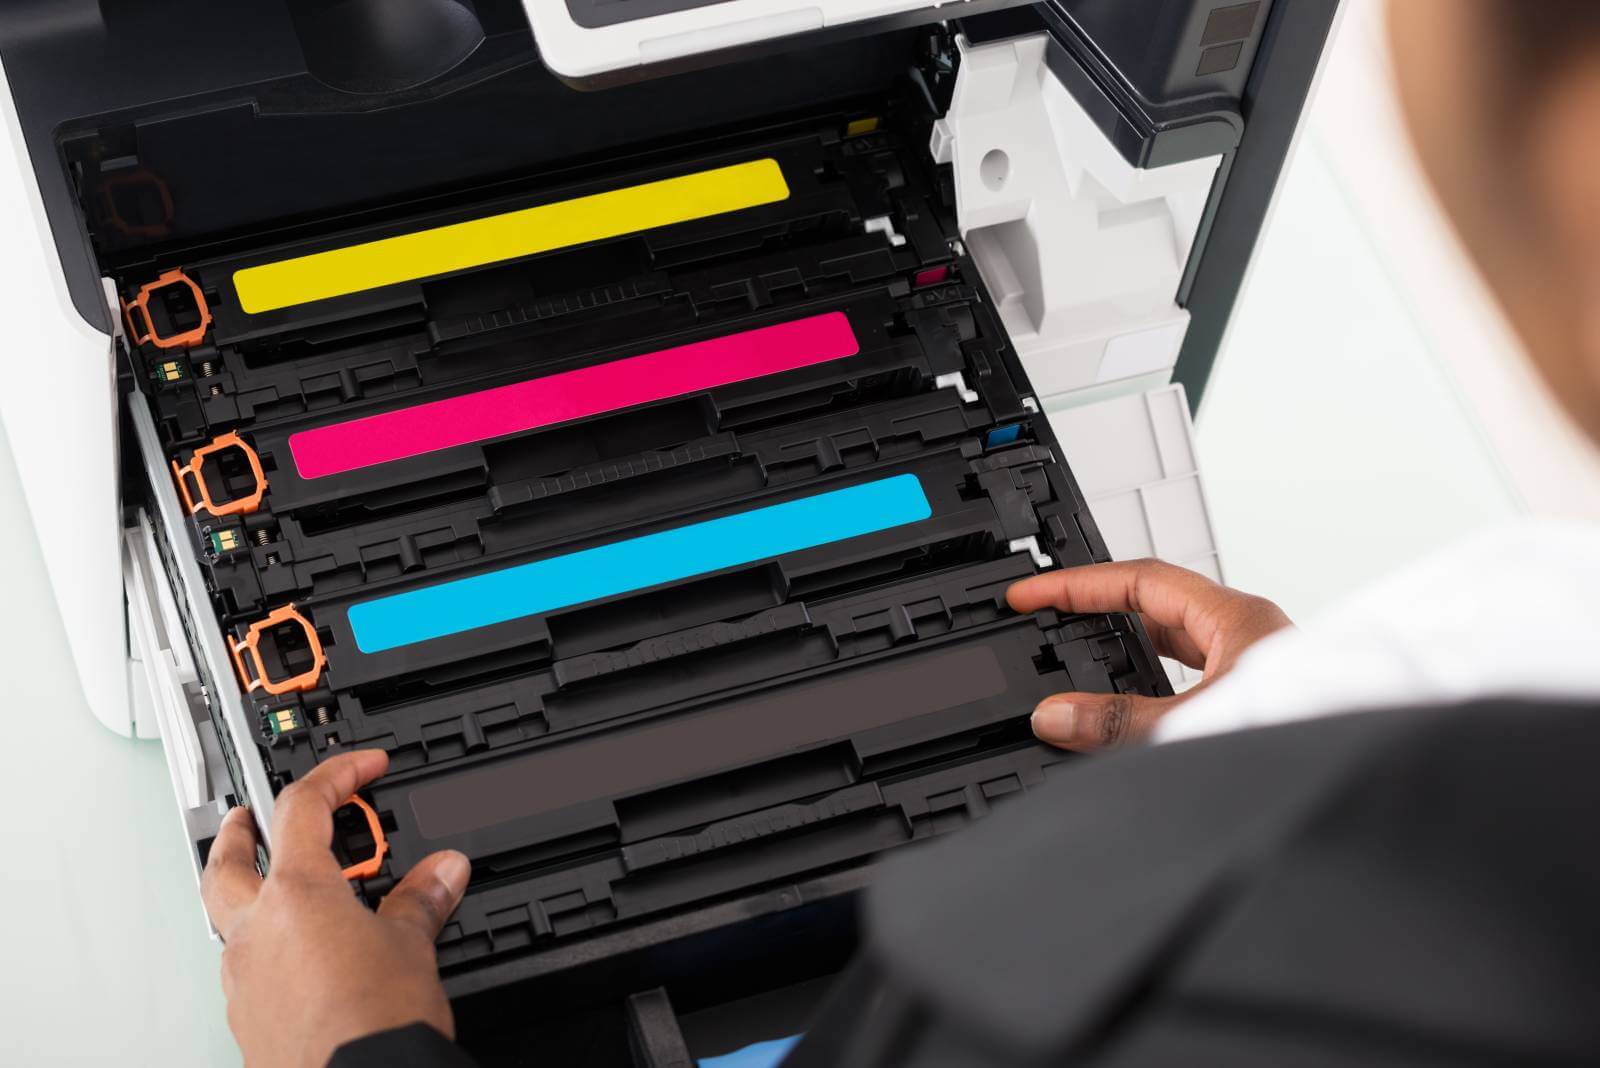
The toner (being attracted to the positive areas) sticks to the black areas of the image on the drum. For colour copies, the drum attracts the cyan, magenta and yellow and black toner. From these four colours, a wide spectrum of colours can be formed.
The resulting toner on the drum is transferred to a piece of paper, which has a higher negative charge than the drum.
The toner is melted and bonded to the paper using heat and pressure rollers. Then, finally, your photocopied document comes out of the copier. Because heat is used, the paper that comes out of a copier is warm.
The Basics
The human-end of making a copy begins with a few basic steps:
-
- Open the copier lid
-
- Place the document to be photocopied face-down on the glass
-
- Select the options you want (number of pages, enlargements, lighter/darker)
Press the Start button
What happens inside the copier at this point is amazing! At its heart, a copier works because of one basic physical principle: opposite charges attract.
As a kid, you probably played with static electricity and balloons. On a dry winter day, you can rub a balloon on your sweater and create enough static electricity in the balloon to create a noticeable force. For example, a balloon charged with static electricity will attract small bits of paper or particles of sugar very easily.
A copier uses a similar process.
Inside a copier, there is a special drum. The drum acts a lot like a balloon -- you can charge it with a form of static electricity.
Inside the copier, there is also a very fine black powder known as toner. The drum, charged with static electricity, can attract the toner particles.
There are three things about the drum and the toner that let a copier perform its magic:
-
- The drum can be selectively charged so that only parts of it attract toner. In a copier, you make an "image" -- in static electricity -- on the surface of the drum. Where the original sheet of paper is black, you create static electricity on the drum. Where it is white, you do not. What you want is for the white areas of the original sheet of paper to NOT attract toner. The way this selectivity is accomplished in a copier is with light -- this is why it's called a photocopier!
-
- Somehow the toner has to get onto the drum and then onto a sheet of paper. The drum selectively attracts toner. Then the sheet of paper gets charged with static electricity, and it pulls the toner off the drum.
-
- The toner is heat sensitive, so the loose toner particles are attached (fused) to the paper with heat as soon as they come off the drum.

The drum, or belt, is made out of photoconductive material. Here are the actual steps involved in making a photocopy:
-
- The surface of the drum is charged.
-
- An intense beam of light moves across the paper that you have placed on the copier's glass surface. Light is reflected from white areas of the paper and strikes the drum below.
-
- Wherever a photon of light hits, electrons are emitted from the photoconductive atoms in the drum and neutralise the positive charges above. Dark areas on the original (such as pictures or text) do not reflect light onto the drum, leaving regions of positive charges on the drum's surface.
-
- Negatively charged, dry, a black pigment called toner is then spread over the surface of the drum, and the pigment particles adhere to the positive charges that remain.
-
- A positively charged sheet of paper then passes over the surface of the drum, attracting the beads of toner away from it.
-
- The paper is then heated and pressed to fuse the image formed by the toner to the paper's surface.
Parts of a photocopier
A typical photocopier (also casually known as a 'xerox machine') consists of the following components:
A photoreceptor drum (or belt), which is covered by a layer of semiconductor material, such as selenium, silicon or germanium. This is arguably the most critical part of the machine.
A toner, which is just pigmented liquid. Sometimes referred to as 'dry ink', a toner is a dry mixture of fine, negatively-charged plastic particles and colouring agents that create the duplicate image on a piece of paper.
Corona wires, which, when subjected to a high voltage, transfer a field of positive charge to the surface of the photoreceptor drum and the copy paper.
A light source and a few lenses, which shine a bright beam of light on the original document and focus a copy of the image onto a specific place, respectively.
A fuser can be considered the 'final' main component of a photocopier, as a fuser unit melts and presses the toner image onto the copy paper and imparts the final touches to the duplicate image just before it's ejected from the machine.
Here's how the process works today:
Charge.
Inside every copier and laser printer is a light-sensitive surface called a photoreceptor. It consists of a thin layer of photoconductive material that is applied to a flexible belt or drum. The photoreceptor is insulating in the dark but becomes conducting when it is exposed to light. It is charged in the dark by applying a high DC voltage to adjacent wires, which produces an intense electric field near the wires that causes the air molecules to ionise. Ions of the same polarity as the voltage on the wires deposit on the photoreceptor's surface, creating an electric field across it.
Expose.
In a digital copier or printer, the image is exposed on the photoreceptor with a scanning modulated laser or a light-emitting-diode image bar. In older analog copiers, reflected light from an illuminated image is projected onto the photoreceptor. In either case, the areas of the photoreceptor exposed to light are selectively discharged, causing a reduction in the electric field. The darker areas retain their charge.
Develop.
The pigmented powder used to develop the image is called toner. Toner particles made of colourant and plastic resin have precisely controlled electrostatic properties and range from about five to 10 micrometres in diameter. They are mixed with and charged by magnetised carrier beads that transport them to the development zone. The particles are charged by the phenomenon of triboelectricity (often referred to as static electricity). The electric field associated with the charge pattern of the image on the photoreceptor exerts an electrostatic force on the charged toner, which adheres to the image. A colour document is formed by a printer with four separate xerographic units that create and develop separate cyan, magenta, yellow and black images. The superposition of these powder images produces full-colour documents.
Transfer.
The powder image is transferred from the photoreceptor onto paper by bringing the paper in contact with the toner and then applying a charge with polarity opposite to that of the toner. The charge must be strong enough to overcome the powder's adhesion to the photoreceptor. A second precisely controlled charge releases the paper, now containing the image, from the photoreceptor.
Fuse.
In the fusing process, the toner comprising the image is melted and bonded to the paper. This is accomplished by passing the paper through a pair of rollers. A heated roll melts the toner, which is fused to the paper with the aid of pressure from the second roll.
Clean.
Toner transfer from the photoreceptor to the paper is not 100 percent efficient, and residual toner must be removed from the photoreceptor before the next print cycle. Most medium- and high-speed copiers and printers accomplish this with a rotating brush cleaner.
Xerography is a unique process that depends on chemical, electrical, mechanical and software know-how. The rapid and economical digital printing process easily produces either one print or hundreds of identical prints in black and white or colour. More importantly, the capability of page-to-page variable imaging with xerography enables on-demand printing of complete documents such as brochures and books. Such on-demand printing can save time, reduce cost, and eliminate document obsolescence, overruns and warehousing.
Key Principles
If you've ever been curious to know just how a photocopier gets ink onto all those copies, you would be surprised to learn that it's quite an easy operation.
The design of most photocopiers is based around giving opposing electrical static charges to the 'ink' (actually a black powder called toner), and a rolling drum, to attract them to each other. Light is also an important part of the process for producing the image on the drum. The final process involves heat to fix the toner to a sheet of paper.
Step 1 - Creating an Image of the Original Document on the Drum
The process starts when the document is placed onto the glass. The copier scans the surface of the glass (the bright light). The light bounces off the white parts of the original document, and through mirrors, it is reflected onto the drum, which has been given a positive electrical charge.
The drum is surrounded by a photoreceptive layer or special coating that conducts electricity when light falls onto it. Where the light falls (the white parts of the original document), the drum conducts, and the electrostatic charge is lost. Where there is no light (the black parts of the document), the drum does not conduct and maintains its positive charge.
An image is produced onto the surface of the drum, but the image is made up of positively charged static electricity. A photocopier gets its name from the process of light that produces the copy of the image.
Step 2 - Charging the Toner Powder and Transferring It to the Drum
The toner is a black powder which is also charged by the machine. This time the charge is a negative one. The negative toner is drawn from the cartridge and attracted to the positive parts of the drum, which correspond to the black parts of the original document. You now have a drum with an image made up of black fine toner powder, which is a perfect replica of the original document. It now needs to be transferred to the paper.
Step 3 - Transferring the Image onto a Sheet of Paper
The drum now rolls onto a heated sheet of paper. The toner powder transfers onto the sheet with the heat and becomes fixed into place, which is appropriately called 'fixing'. When the sheet of paper with its photocopied image rolls out of the machine, it still feels warm from the final part of the process.
What's different about digital photocopiers?
Copiers that work like this are essentially using analog technology: they scan an original document and reproduce it-using nothing more than optics and static electricity-as a faithful copy. From 1949, when the very first Haloid Xerox photocopier went on sale, to the early 1980s, all copiers worked this way. Everything changed in 1981 when Ricoh patented a crude digital photocopier. The first digital copiers from Ricoh, and later Canon, went on sale several years later.
Today, analog copiers are essentially museum pieces and most copiers work digitally: they scan a document using an image-sensor chip (CCD or CMOS), create a digital version (typically a JPG or TIFF file), and then print that digital image in the same way as an inkjet or laser printer. Since they scan very hi-resolution digital images, they can reproduce with the same resolution as a high-end laser printer (several times better than an analog copier). Once a document is in digital form, it's easy to enlarge or reduce it by any amount. Digital copiers also produce "cleaner" copies with better control of the image density and contrast than analog copiers.
You can think of a digital copier as a combined scanner and printer, coordinated by a built-in computer; and, indeed, the popular all-in-one print, scan, copy, and fax machines you can buy for home offices work just like this, with separate scanning, printing, and faxing "modules" hooked together. They start with a digital image (either a document you've scanned, fax from a phone line, or something received from a computer through a USB cable or wireless connection-Wi-Fi Direct or Bluetooth), store it, and then print it. Some digital machines allow limited editing of documents before they're printed. Some let you save documents for printing again later (without the need to rescan them) on a built-in hard drive, flash drive, or SD card. Copiers with memories also make it much easier to duplicate complex, multi-page documents without the need to scan any of the pages more than once.
Although digital copiers are versatile, convenient, and inexpensive, there are some risks of using them in offices or other shared/public places. If they have hard drives, the documents they process are usually stored there, which can create a security risk: even when documents are deleted, recoverable traces can be left behind. Some copiers use encryption to get around this, while others take pains to erase documents from their hard drive more thoroughly and securely.
Photocopier Health & Safety
As with any big piece of machinery, there are certain health and safety precautions to remain aware of throughout the life of the copier. By following the tips below, you can extend the life and effectiveness of your machine for years to come.
Ventilation
You should ensure that your copier has plenty of space around and, if up against a wall, that the ventilation shafts have room to expel air. If the copier room is small or the office not particularly well ventilated, then we suggest using electric fans to keep a cool and steady temperature.
Location
Following on from ventilation, you should also ensure that your copier is placed at a suitable height. This means a height that does not encourage excessive bending and stretching to insert/change the paper or collect finished prints.
Read the Manual
When installing a new copier, you should do your best to encourage those who will be using it regularly to take a look at the manual and familiarise themselves with how to use it safely. This may include reading up on any heat emanating from the machine, the replacement of lamps and toner material. You also ensure that those responsible keep the copier clean and tidy as build-ups of dust and debris can cause issues and shorten the lifespan of the copier.
And there you have it. Now you know exactly how a photocopier works and have a great conversation starter for your next company event!